Calibration is of critical importance for making accurate measurements from your VNWA. Without calibration the VNWA will indicate random values.
Please see Introduction to Calibration for further information, including video tutorial
BNC Calibration Kits
600 MHz BNC 4 pcs Plug (Male) Calibration kit for the DG8SAQ Vector Network Analyzer fitted with BNC Bracket and FA-VA5 Analyzer
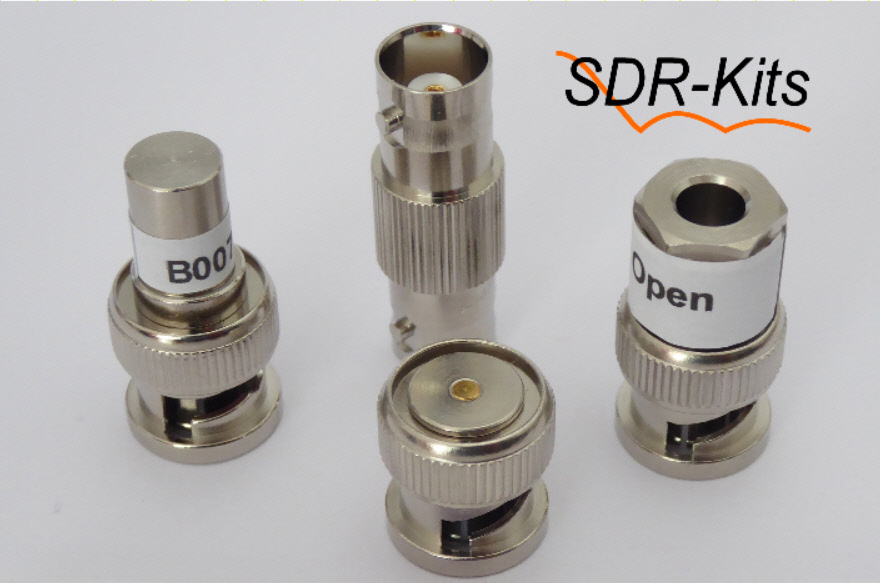
Male and Female Calibration Kit offering accurate calibration up to 600 MHz - also suitable for other Test Equipment.  The kit includes the following components, all are manufactured by Amphenol:
- 1pc BNC Shorting Plug
- 1pc BNC Open Plug
- 1pc Calibrated 50Ω Load Plug (Male)
- 1pc BNC Jack to BNC Jack Adapter
The BNC Load is marked with batch and serial number and is supplied with a printout of the measured data in the format below which may then be entered manually in the instrument setup.
The print-out also provides the download link of the VNWA BNC Calibration Kit file (VNWA .ckf format) for the BNC load supplied.
This file may be stored direct in the VNWA Directory DefaultCalKit for use when the BNC Cal Kit is being used.
Please note: Calibration of the VNWA will still be required to compensate for VNWA hardware differences.
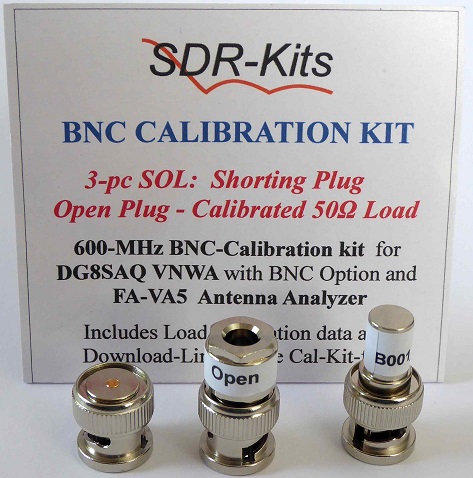
600 MHz BNC 3 pcs Plug (Male) Calibration kit for DG8SAQ VNWA
fitted with BNC Bracket Option and the FA-VA5 Antenna Analyzer Kit
Offering accurate calibration up to 600 MHz - also suitable for other Test Equipment.
 The kit includes the folliowing parts which are all manufactured by Amphenol:
- 1pc BNC Shorting Plug
- 1pc BNC Open Plug
- 1pc Calibrated 50Ω Load Plug (Male)
The BNC Load is marked with batch and serial number and is supplied with a print-out of the measured data in the format below which may then be entered manually in the instrument setup
The print-out also provides the download link of the VNWA BNC Calibration Kit file (VNWA .ckf format) for the BNC load supplied
This file may be stored direct in the VNWA Directory DefaultCalKit for use when the BNC Cal Kit is being used.
Please note: Calibration of the VNWA will still be required to compensate for VNWA hardware differences.
BNC Adaptor Bracket
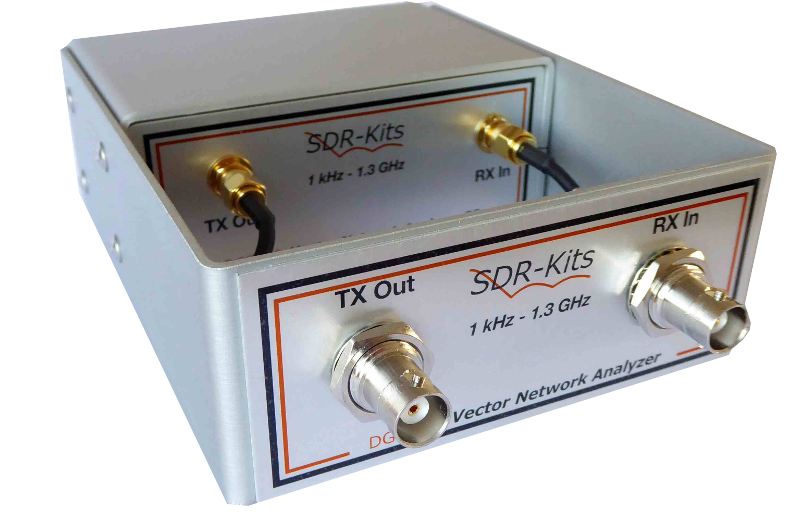
The BNC Bracket is an optional upgrade kit to convert the DG8SAQ VNWA 3
or 3EC for use with the popular BNC series connectors in response to
requests from a number of existing VNWA users.
Based on a
design by Dom F1FRV, the kit consists of an anodized aluminium bracket
fitted with 2 quality BNC Jack to SMA Plug pigtails which are screwed
into the VNWA front panel SMA Jacks.
The bracket comes with a fitted Aluminium front panel and a 2mm hex key tool to carry out the conversion.
Use
of a 0.5Nm torque wrench is recommended when tightening the SMA plug
connectors to the VNWA, but this is not essential provided care is taken
not to over-tighten these connectors.
The BNC bracket conversion is reversible and the VNWA can be changed back to normal SMA Jackets whenever it is required again.
Note: The standard VNWA with SMA connectors shown in the photo is NOT included in the order for the BNC Bracket, but must be purchased separately.

Conversion Kit contains:
- 1 pc assembled BNC Bracket complete with fitted BNC - SMA pigtails and front panel
- 8 pcs 3mm dia x 8mm long hex screws
- 6 pcs 3mm 19mm dia Rubber Feet
- 1 pc 3mm hex tool
BNC Conversion Kit Fitting procedure:
The conversion should take less than 20 minutes and consists of the following steps
A. Check kit contents are as listed
B. Make sure the VNWA is functioning correctly before carrying out the conversion.
C. Remove the 8 hex screws on each side of the VNWA using the hex tool supplied but make sure you do not remove the VNWA covers in the process.
D. Fit the VNWA in the BNC bracket and replace the original hex screws with the 8mm long hex screws supplied. Do not tighten the screws at this stage.
F. Carefully fit the SMA Pig tail cable Plugs to the
VNWA front SMA Jacks and tighten the connectors to a recommended value
of 0.5Nm, this is a slightly higher than when tightening by hand for an
average person. Be careful not to over tighten the SMA plugs when using
other tools than the recommended 0.5Nm 8mm Torque wrench!
E. Fit 2 pcs Rubber feet to the bottom front of the BNC Bracket.
F.
If your VNWA is fitted with the smaller 13mm dia rubber feet, then
remove these feet and replace with the 4 pcs 19mm dia rubber feet
supplied.
Note: Newer VNWAs are already shipped with the 19mm dia rubber feet - these VNWAs do NOT need the rubber feet replaced.
G. Place the VNWA and Bracket on a flat surface and align the position of the VNWA within the bracket so all 6 Rubber feet are aligned flat on the surface before tightening the 8 hex screws.
H. Test the converted VNWA for correct operation.
